
Keeping your motorhome roof clean not only helps to reduce the effect of black streaks, but it’s also an opportunity to check its condition and any accessories fitted up there.
Most motorhome owners clean their roof twice a year, but if you store yours close to trees or the road, you might find you need to clean your motorhome roof more often to clear algae and debris build-up.
In this video, we visited Richard Baldwin Motorhomes in Halifax, to bring you our top tips on how to clean your motorhome roof as well as the equipment needed.
Motorhome roof cleaning equipment
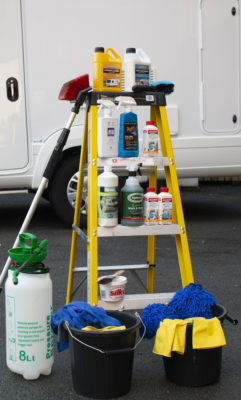
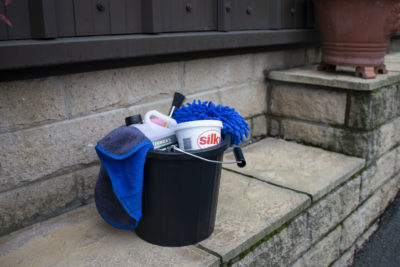
To clean your motorhome roof you’ll need:
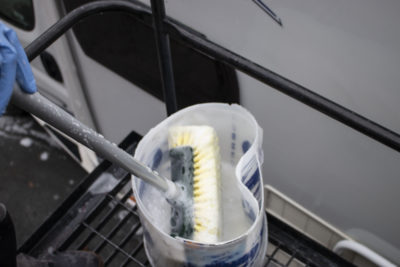
- A long-handled brush, preferably one with a hose attachment.
- A squeegee for drying (or window drying gadget)
- Some microfibre cloths and a sponge
- A hosepipe or pump sprayer
- A bucket
- Some motorhome shampoo and polish
- An appropriate ladder
- A clean paintbrush for tricky areas
- Over-wintering solution or protector
Ladder safety
Make sure the ladder you use to clean your motorhome roof is the correct height. It really needs to be taller than the motorhome if possible, so you can easily reach the roof.
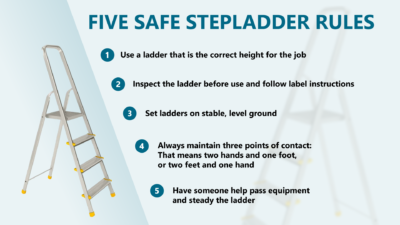
You also need to maintain three points of contact with the ladder. For example, two feet on a step and one hand on the rail. If possible have a second person to steady the ladder whilst you’re up it and allow that person to pass equipment up to you. It’s important that you don’t on the top step of the ladder. In a lot of cases, this isn’t a step, it’s a hinge mechanism.
Step 1
Park the motorhome uphill
Before starting to clean the roof, park the motorhome uphill to encourage water runoff. If you’re on level ground use some levelling ramps to raise the front of the motorhome.
Step 2
Wash down
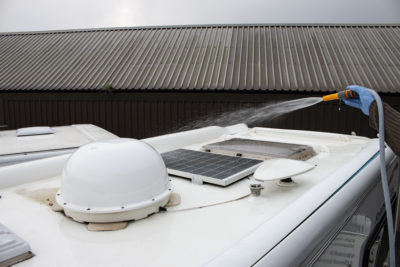
Start by washing down the motorhome roof and removing any debris. If you’re using a hosepipe, be careful not to get too close to any of the vents or rooflights – use the spray to disperse any debris off the roof. If you’re using a pump sprayer, get plenty of water on to the roof to moisten and lift the dirt.
Step 3
Open and clean around the rooflights
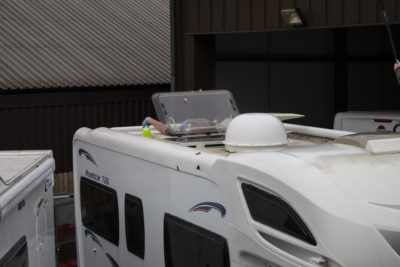
Dilute some shampoo in a bucket and with this solution moisten a microfibre cloth or sponge, then pop inside the motorhome and raise any TV antennas and open the rooflights. Wipe around the edge of the rooflights with your cloth or sponge, paying attention to the roof and the lip of the skylight. Once clean, close them up and go back outside to start cleaning the roof.
Step 4
Shampoo and wash
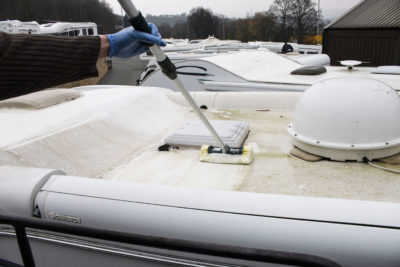
Dip the long handled brush into the shampoo solution and start to clean the motorhome roof. It’s a good idea to divide the roof into six equal parts, for example, front left; left side; and left back; focusing your cleaning on each segment. But start by cleaning around the rooflights you’ve already wiped down.
Occasionally dip the brush in the shampoo solution as you continue to clean the dirt off the roof.
Vents and fixings
Gently brush around any vents and fixings. You might not be able to get too close or under these items. If that’s the case, use a microfibre cloth or sponge on and under items such as solar panels, TV antennas and satellite domes.
For more tricky areas we used a clean household paintbrush and some Silky cream cleaner. Areas, such as gutters and the TV antenna, can really benefit from some intensive cleaning, so here work the product in with the paintbrush to remove any dirt or algae from the moulding, then rinse off and wipe clean.
Step 5
Rinse off and dry
Once half the roof is complete use your water source again to wash off any debris and dirt. Then repeat the cleaning process until the entire roof is nice and clean. To dry the roof, use a squeegee to soak up as much water as you can, then wring out to remove the water, and keep repeating this process.
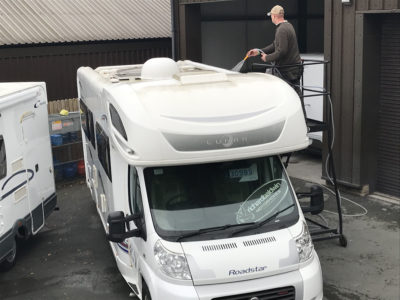
Cleaning overcab areas
Motorhomes with overcab sleeping layouts can be a bit trickier to clean. For these areas, we suggest using a long-handled brush with a hose attachment that has a constant stream of water flushing through the brush head.
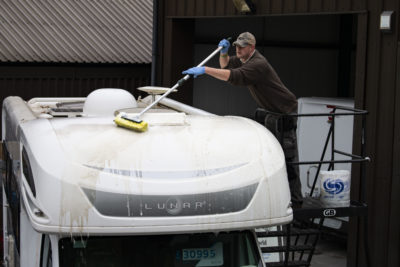
Use this to wash as much as you can, repositioning the ladder as you go. But be careful not to over-stretch or lean over the motorhome.
Step 6
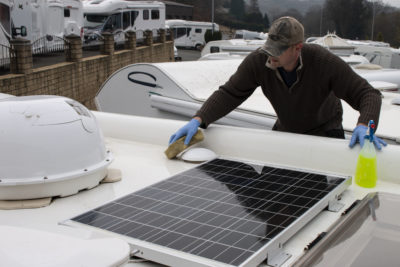
Solar panels
It’s important to keep your motorhome solar panel as clean as possible, as this will maximise the charge that the solar panel can put into your motorhome’s leisure battery when in storage.
Gently use a microfibre cloth to clean and dry.
Step 7
Overwintering or polish
If you’re cleaning your motorhome roof before storing away, you might want to consider an overwintering product, a motorhome protecting product or a motorhome polish to help repel dirt, and prevent build-up of moss or algae.
Step 8
Clean the front, back and sides of the motorhome
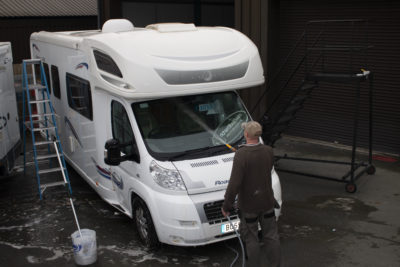
Once the motorhome roof is nice and clean, you’re going to have to clean the front, sides and back to get rid of any dirt and debris which will have run down the vehicle. Here’s our motorhome cleaning guide.
Over to you…
Got any tips on cleaning a motorhome roof that you’d like to share with other motorhomers? Feel free to comment in the box below.
Sorry, meant “Silky” ??
It’s a cream cleaner: https://silkyleisure.co.uk/
What’s “jiffy” ??
I find that if you put some of the solution into a spray bottle and l spray the affected hard areas to clean,and leave for around 5 mins a lot of the dirt can be removed with a gentle hosing.
I’ve said it before. Get up on the roof on all fours and a sponge with Jif.
Good tips,.I have a step ladder that adjusts to a straight ladder and I have wrapped sponge around the top of ladder to protect the edge of the roof. You’d be surprised how many motorhome owners can’t be bothered cleaning the roof. Go to a motorway services or bridge and watch the traffic below, you will be surprised.
Thanks for sharing Michael
I try to use an old brush handle and cleaning cloth wrapped over the end and loose, this will assist getting most dirt away, persevere doing it a few times with clean cloths.
There’s no substitute for getting up on the roof and scrubbing on all fours. You get wet knees but you get the roof clean.
I use ladder or high platform steps and a 9 foot baton across the roof to kneel on to spread my weight
I watched with bated breath to see how you clean the underside of the front over cab area. You didn’t! I still don’t know how. I do have the extending brush as shown but this isn’t tough enough. I can’t lean a ladder against the windscreen because the angle is too acute, and the ladder might break the glass. I don’t have the gantry.
Hi Andrew, we found the extending brush was tough enough but suppose it depends how dirty this area is. Sorry you’re still not sure how to clean this area. Have you tried using a step ladder?
Your cleaning guide is very good, but the one area you have missed and where most black lines originate, is beneath the solar panel. You can only clean so far with a cloth.
Perhaps it would be a good idea that when the panels are installed, that they can be hinged at one end, obviously with an appropriate fail safe locking mechanism for when fixing (locking) back onto the roof by the owner after cleaning.
Thanks liz. I will get some and give it a try. Best wishes.
My recently purchased second hand MH has a large number of black marks on the roof (alge??) which refuse to budge by washing. They can only be removed by polish and elbow grease. I use a scaffold tower to access the roof but I am unable to reach the centre and have a 2 ft section where these marks remain. Has anybody any suggestions.
When we are in Spain the petrol station there has a gantry that you can use so you can clean the roof easily, it would be a good idea if the supermarkets or petrol stations that had car washes here did the same and installed gantries. Can you imagine the extra trade it would generate,motor homes and Vans wouldn’t go anywhere else.
Great idea Robert or on campsites?
My roof has lots of scratches on the roof (from trees) and isn’t smooth anymore. Can it be re-laquired? Or can I buy anything to help repel the dirt and grime?
Fenwicks overwintering protector is designed to protect against algae, mould, bird lime, etc during winter storage.
I’m not keen on climbing ladders so I approach the job from the inside. Using a small stepladder I am able to get head and shoulders through the skylights and apply soap solution then use a variety of brushes and cloths similar to those described in the article. After applying soap and giving everything a good scrub I hose down. (After closing the skylights of course)
Very good artical. Good advice and tips that you might not have thought about.
Very good very helpful
Hi there. Really enjoyed reading this page
Hi it’s nice to know how to clean the motorhome as it’s my first year with my motorhome.
I use wet and for get spray it on and leave very good .
I would also mention to clean the wind out awning if fitted, especially the front end piece where the flies get stuck.
2 platform ladders and a builders 8ft plank. Been using this method for years. OK so long as you don’t mind heights. When I purchased my M.H. Twelve years ago I could wash the top,2 sides, back and front in 1 day, now it takes me 3 days.
Nice to know I have been doing it largely as suggested. I use a platform ladder to walk along. Saves some time and a bit more stable. I always clean the van before adding cover, once dry.