In this video we go through our 10 steps to cleaning your motorhome. Although it can be a daunting task, washing and cleaning your motorhome regularly will keep it in good shape for longer.
To film our motorhome cleaning guide we visited Richard Baldwin Motorhomes in Halifax, where we cleaned an Auto-Trail coachbuilt, which had plenty of black streaks, dust and some road dirt around the body. In a few hours our team had it clean and shiny so it could go back on their sales forecourt.
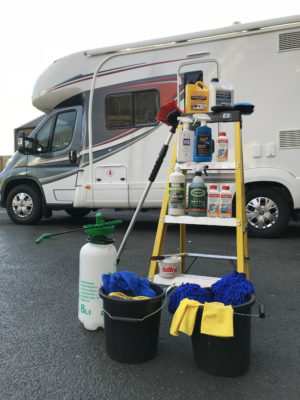
Before you start cleaning here’s the kind of equipment you’ll need:
- Hose
- Two buckets
- Portable pressure sprayer
- Step ladder
- Telescopic long handled brush and mop
- Rubber gloves
- Noodle wash mitts
- Micro fibre cloths
- Small paintbrush
- Alloy wheel brush or sponge
- Mellerud black streak remover
- Silky cream cleaner
- Fenwicks motorhome cleaner
- Triplewax Waterless Wash and Shine
- Meguiars Quik Wax
- Autoglym Fast Glass
- A helper with plenty of elbow grease!
We used a variety of different products on different parts of the motorhome, but did use specialist cleaners. It’s always worth checking your handbook in case your manufacturer advises against the use of certain cleaning products.
Step 1.
Rinse down
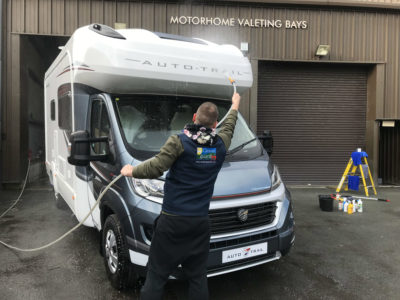
Starting from the top, give your motorhome a good hose down to wash away any loose dirt. Don’t use a high pressure jet washer as this could cause damage to your seals.
Step 2
Clean the roof
Using the Fenwicks concentrated motorhome cleaner diluted in a bucket of water start to clean the roof with the telescopic brush. This is great at lifting any algae, stains and stubborn dirt. Get someone to help you up and down the step ladder and to hold it in place as you tackle this area.
Use plenty of soap on the brush and enough pressure to remove grime. Work from the back of your motorhome to the front, carefully moving the step ladder as you go.
Be careful around any fixtures or fittings on the roof, such as solar panels or satellite dishes. If you can reach try using a paintbrush or long handled emulsion pad doused in plenty of water and shampoo mix to clean underneath the solar panel or around fixings.
Step 3
Hose it
Hose down the roof and all sides of the motorhome so it’s all nice and wet.
Step 4
Remove the streaks and stains
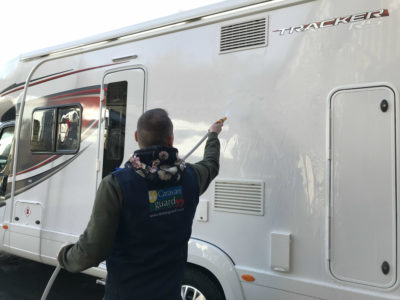
Paying attention to any black streaks over the cab, where there’s run off from the roof and around windows and lockers, use a black streak remover to wipe away these marks before rinsing off.
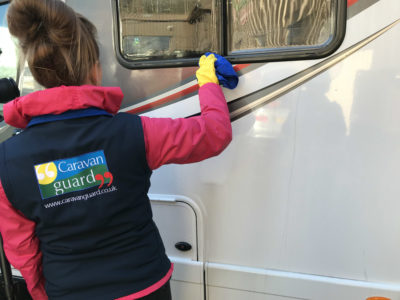
If you have a build of algae then a cream cleaning product like Silky is great at getting rid of these stubborn marks. Simply use a small paintbrush dipped in the pot and then apply to the motorhome, agitating it into the affected areas with the brush. Leave the product to work for a short time and then rinse off once again with a hosepipe or garden sprayer, making sure all the product is washed away.
Step 5
Time for a wash!
Using a specialist motorhome cleaner, dilute it into a bucket of warm water. Use the two bucket method, where you have the cleaning product and warm water in one bucket and a second bucket filled with cold fresh water. Soak the wash mitt into the cleaning product to clean the side of the motorhome and then rinse in the cold water to remove any grit from the mitt before dunking it back into the soapy water.
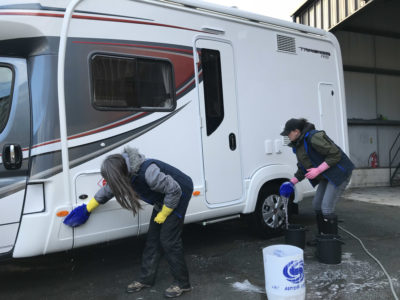
Continue to repeat this working around the motorhome in sections until all sides have had a good wash and clean.
Step 6
Fridge grills and windows
To clean the fridge grills, unclip from the motorhome and give the surround a good wipe down. Clean the grill using a microfibre cloth and the same cleaning solution. Once cleaned, dry down and clip back into place.
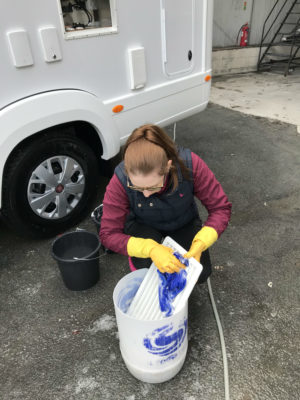
Be careful with the motorhome’s acrylic windows. Give them a wipe down with your bare hands dipped into the cleaning product. This way you can feel for any grit to avoid scratching the delicate acrylic.
Step 7
Tyres and wheels
If you have alloy wheels use an alloy wheel brush to wash down the wheels, getting into those tight nooks and crannies. If you have hub caps then thoroughly clean with a sponge or softer brush so you don’t scratch the surface.
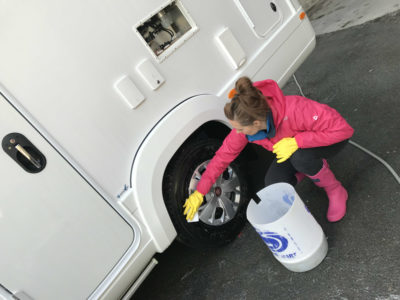
Then give the tyres a wipe over.
Step 8
Rinse and wipe
Rinse the motorhome once again to remove all the soap and loosened debris and then give all areas a wipe down with microfibre cloths to remove any excess water.
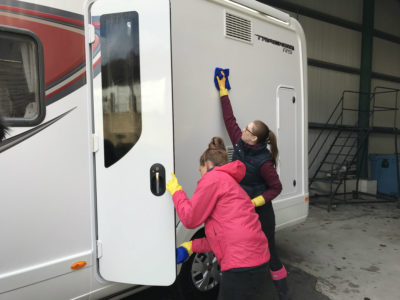
Remember to open any doors and wipe down the surrounds.
Step 9
Glass cleaning
Using a glass cleaner which is suitable for acrylic windows, such as Autoglym’s Fast Glass, spray onto the windows, wipe down and then buff up to a shine with a dry, clean, microfibre cloth.
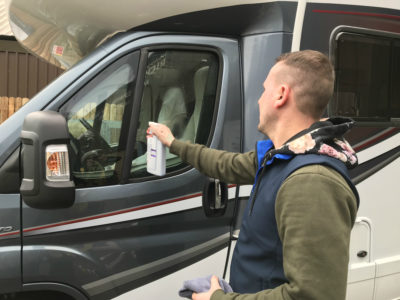
This will get rid of any water spots and streaks and make them sparkly clean!
Step 10
Wax and polish
Finally, work a wax product into the motorhome’s bodywork to give it a layer of protection and a deep shine. Apply by either spraying directly onto the motorhome or onto a microfibre cloth and wipe onto the bodywork. Allow it to cloud over for a few minutes and then buff off with a clean cloth until it sparkles!
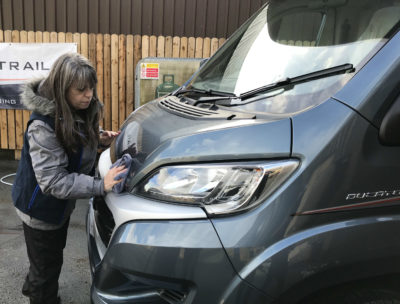
Another product which is great at keeping your motorhome clean and protected when on the road is the Triplewax Waterless Wash and Shine. By leaving it in your motorhome when you’re on your travels you can quickly keep on top of any dirt. You simply spray onto the motorhome and then using a clean microfibre cloth, wipe over until it clouds up and then buff to a shine.
So there’s our 10 point step-by-step guide to cleaning the exterior of your motorhome. Remember, a regular hosing down of your motorhome will clean off any loose road dirt and polluted rain water and prevent stubborn marks from building up on the bodywork. And it’s worth keeping on top of bugs in the summer and the green mossy stuff building up in the other months.
There are more motorhome cleaning tips in our previous guide.
Over to you…
Got any motorhome cleaning tips to share? Feel free to add them in the comments box below.


Learnt a lot….thanks
Thanks for all the good advice on this forum.
Excellent
We need to apply anti rust and rust remover to the under neath the van.
What is best to use.
Would appreciate any advice.
For Robin del Mar. Chandlers sell a product called Y10 designed to whiten yellowing fibreglass and remove staining. It works
I’ve watched this before but missed “Silky cream cleaner”. What is it and who makes it, ie manufacturers name. It looks good.
Silky is the manufacturer Don. You can find out more here:https://silkyleisure.co.uk/shop/
How do you clean the sealant?
We use a product called Silky, applied with a soft brush.
Hi, we manage to keep our chausson flash S2 clean apart from the SILVER TRANSFERS which have marks which seem to be permanent. Please can you help?
It’s all very well cleaning a nice new Autotrail Tracker but my 12 year old Autocruise Stardream is a different proposition. Getting up on the roof is a necessity. A ladder against the back with a rubber mat to protect the bodywork, and careful not to put too much weight over the Luton. It looks ok from a distance but up close the white sides are going quite grey. How do you restore the White?
Stay tuned to our blog Robin for a video on cleaning the roof.
Would you recommend spraying the van with Wet and Forget to prevent the green stuff? We used it on a static van and it helped.
Hi Frank, it’s not something we’ve used and would check it’s suitable for use on the motorhome body. There are some over-winterising protectors which believe could do a similar job, such as the Fenwicks Overwintering Exterior Protector. This repels water, dirt and algae and is suitable for use on plastics, aluminium, glass, acrylic windows, GRP, ABS, fibreglass, decals, sealants, and paint.
Larry the easiest and safest and cheapest way to keep your van clean is to spray an aquawax after cleaning. I’m a professional valeter and would not apply any fungicide on a motorhome roof
Thanks for sharing Mike.
Gill if your van has an additional coating you should not use anything stronger than a car wax/wash shampoo Megiuars Gold is a good one to use.
I wash mine down every time we return from our trip!!
Really good and heplful video. But does the same procedure apply when your motorhome has a special and expensive coating applied to the bodywork? It is said that you have to avoid all chemical cleaners even auto glyms – which are an excellent range of products known for no harsh chemicals. My motorhome has such a finish applied from when the vehicle was new. What do I need to do regarding the algea on the roof and black runs.
Many thanks. Gill
Hi Gill, check your manufacturer’s handbook about the bodywork or with your dealer. For the algae and black runs there are a range of black streak removers. We used Silky cream cleaner for the algae and Mellerud black streak remover. Apply these and rinse before the shampoo. Hope this helps?
Very good video but I think you should have shown how you guy reached and cleaned the Louton with all the black streaks on it.
Thanks John. We rinsed it down and then using the black streak remover we rubbed it over the affected area from the step ladder and then rinsed off before shampooing.
Your timing. 4 hours is with two people so with one that would be about 8 hours. That’s more like my experience. Clarify please.
Hi Larry, we had different people doing different jobs at various times throughout the clean. I imagine it could take up to eight hours for one person.
A little more detail on waxing and polishing the roof would be appreciated. How do you get up there – stepping onto roof from a ladder – watch stepping on lutons!! – just the best physical tips for accomplishing it. There is a product called Wet and Forget to remove mildew and protect. Should that go on first? Does it then need wax and polish. i.e. how to to get the most lasting polished protection on the roof. I’ve always heard it said that if you keep your roof clean, much of the rest is easy. Your thoughts on roof care please.
Hi Larry, we’ll look into this and see if we can put together some advice for a future blog post and e-magazine. But would avoid stepping onto the roof if possible. Would use the same method as the sides, rinse, remove mildew etc, rinse again, shampoo, rinse, then wax and polish. Hope this helps?
I wonder how long it took to do the entire cleaning and polishing because it takes me hours just to wash and rinse mine!
It took about four hours!
Very detailed instruction on all aspects of cleaning which I will be adhering to.
Very good guide to keeping your motorhome in pristine condition and holding its value
Thanks Roger