If you set up your awning correctly it will help to protect it against unnecessary damage should the weather turn windy.
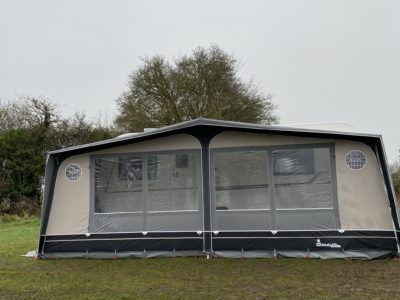
Each year, we deal with hundreds of claims for damage to awnings or caravans due to stormy weather – either when touring or on a seasonal pitch. The good news is that Caravan Guard covers awning storm damage as standard under our caravan insurance policy subject to inclusion of the awning’s value in your insured sums.
In this video, we ask Isabella Awnings for their top tips on how to set up your awning for maximum strength and to protect it from damage.
It’s important advice for touring caravanners but it’s even more critical for seasonal pitch caravanners who will often leave their awnings up for long periods of time.
Tip 1
Make sure the awning is the correct size for your ‘van.
If your awning is too big you won’t be able to get the right amount of tension into it and it will sit baggy on your ‘van. If it’s too small it will be very difficult to peg down. Most awning manufacturers offer a size guide on their website.
Tip 2
Centralise the awning
Once your awning is in the rail, make sure the awning is in the centre of your caravan if it’s a full awning.
Tip 3
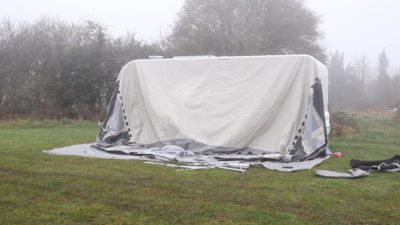
Set up your awning poles correctly
Lay your poles out in front of your awning and then insert all the poles through the canvas as per the manufacturer instructions, usually starting with the front centre vertical leg pole and centre roof pole. This will give you space to work underneath your canvas.
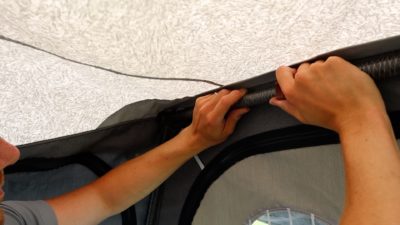
Then work your way out from the centre, placing the poles into the correct positions. Once the main body of the awning is up, make sure (if your model has them) to place the canopy poles in.
Having the poles in the correct place will make sure it sits tightly against your caravan when you peg out.
Tip 4
Tension your poles
For maximum stability, it’s crucial to get good tension into your awning poles. You can do this by hand or by using a tensioning tool like the Hercules, as well as power grips.
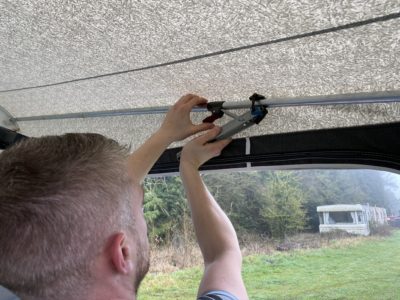
Go around each pole making sure you get the maximum tension you can. If you slacken off the side panels this will enable you to get extra tension into the roof.
Tip 5
Add extra poles and storm straps for stability
If you have a seasonal pitch awning you might want to add extra support poles in the roof and definitely add storm straps for extra stability and to make it more rigid.
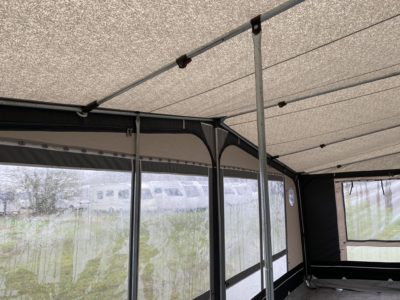
Even on a touring awning, bad weather can strike at any time, so we’d recommend always fitting storm straps.
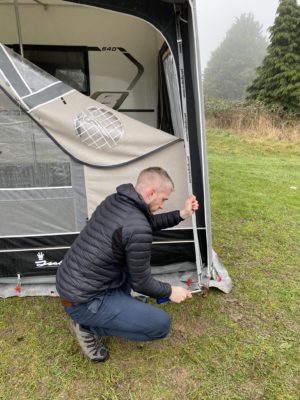
When attaching the storm straps follow the manufacturer’s instructions on attachment, placement and distance.
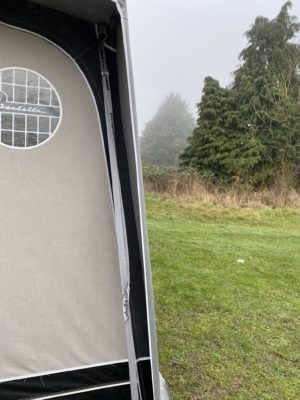
Top tip: Once in place twist the flat straps to reduce vibration and stop them flapping against the awning in windy weather.
Tip 6
Use the right awning pegs
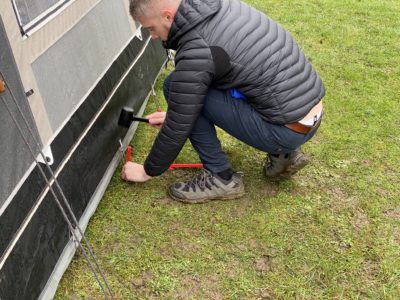
Make sure you use the right pegs for the ground you’re pitching on to, whether that be grass, a hard-standing or soft, muddy conditions.
Tip 7
Peg out your awning correctly
Regardless of your awning type, always peg down the back two corners first slightly underneath the front of your caravan so it sits tight against your vehicle.
Before pegging out also make sure you close all the awning doors and that all the panels are fully zipped up.
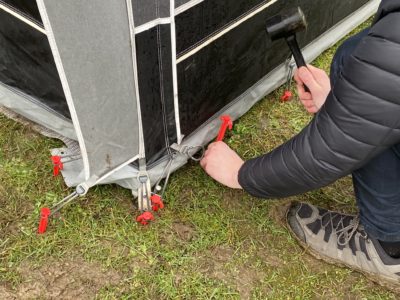
Then go to the front corners of the awning, pull the legs into the seam and peg the foot out to give you a taut straight line to peg out the front of the awning. Use every pegging point on the awning and where a panel meets the main part of the awning to cross those pegging points over for extra tension.
If you’re on wet and muddy ground, you might want to peg through your groundsheet to help keep your awning cleaner.
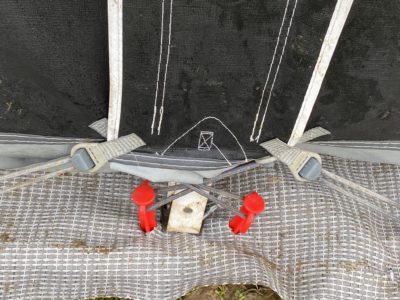
Top tip: Whichever door you’re using on the awning, slightly angle that peg so when you open the door the awning remains tensioned.
Tip 8
Check awning panels and roof
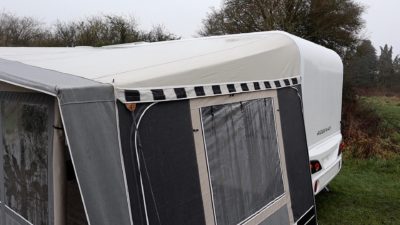
Once the awning has been fully pegged out, check that all panels and the roof are nice and taut. If not, you might need to re-peg, making sure that first pegging point at the back underneath the caravan.
Tip 9
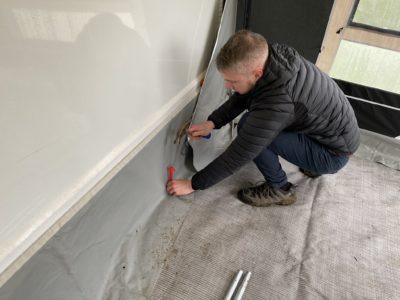
Peg inside the awning
Once you’re happy with the outside of the awning, go inside and tuck the skirt in to prevent wind and water from getting in.
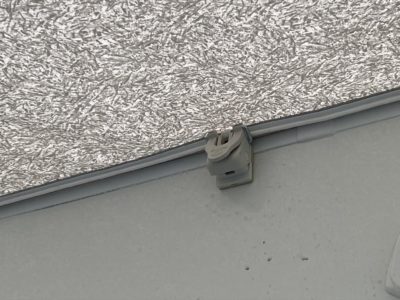
Some manufacturers also have products to make your awning fit nice and snugly to your caravan, such as Fix-on, bracket pads or seal blocks.
Peg the inside of the awning using the pegging points and finally, lay your carpet on top and you’re all set to bring in all your awning accessories and furniture!
Tip 10
Re-tension poles when temperatures rise
It can be cold when first setting up your awning, particularly on a seasonal pitch if it’s at the start of the season. Make sure you re-tension your awning poles as temperatures rise as you’ll be able to get more tension into the roof to prevent it from sagging and rainwater collecting there. If using an air awning, also alter the air pressure as temperatures increase.
Take it down
Remember to always take down your awning if stormy weather is forecast and if you’re on a seasonal pitch ask your site owner if they can take it down or check up on it when you’re not there.
Over to you…
Have you got any tips to share on setting up your awning correctly? Feel free to add them to the comments box below.


I wish someone would show me how to peg out the doorway sill to prevent water pudding into the awning. The sill has to stay loose in a doorway, water then creeps into the awning over the tarpaulin. Surely a sill that could peg either way would help?
I’m searching for answers but all I see is pegging out with no thought to campers using a doorway in wet weather.
Help !! So my awning is up and taut however the huge amounts of rain has sagged the awning top what should I do ?
You need to tip off the rain Zoe and then you might have to re-peg again
I have a continental awning from Kit o Vent. The pegging points are on the inside with a storm skirt on the outside. I have been pegging it on the inside, but I think that from recent stormy weather it should be pegged more on the outside with the outer skirt above the pegs. Any comments? I would prefer an Isabella awning, but this one came with the caravan, which is a Trigano Silver pop top
Hi Bruce, some Eurovent seasonal awnings have a very different method of pegging out compared to others. The inside pegging on these awnings allows water to drip away from the floor of the awning by using an extended skirt, keeping the interior dry. Adding storm straps to this type of awning is attached from the roof, so no extra pegs on the outside are required. IF at all in doubt, consult the user manual or better still contact a dealership that stock these awnings.
Very good article. We used to have an awning when the children came with us. But we just have a canopy now, even so some of the tips and pointers in this article are useful and can be used, especially the storm straps and a twist stops them flapping and vibrating…. Mind you, when the wind gets that bad its best to put the canopy away.
We are new to caravanning and I have what is probably a stupid question but if, as advised, you cross peg at the door zips then how do you open the doors if it’s pegged down?
Hi Michael, you don’t peg the zips, you cross peg the corner straps. Sorry if I’ve misunderstood your question.
Ron Rafferty iv’e found that it helps to put water lagging strips on the top poles to stop any noise from flaping resulting in having a good nights sleep
If you arrive late at a site do not rush to get set up. Save it for the morning otherwise you may regret it and end up not setting up properly which then runs the risk of damage . As I saw at one site a couple new to erecting a caravan awning declined help from a few of us and ended up pegging through canvas rather than just the tension eye !
We are/were moving up to a caravan this year from a folding camper, and thought I had a good idea of what to do, just shows you keep learning, especially the cross pegging by doors, thanks for the film.A real eye opener as I have seen many a baggy awning on sites.
One big problem with this article.
If you have your groundsheet protruding beyond the awning you will regret it as soon as it starts to rain. Water will run down the awning onto the groundsheet and straight into your living area.
Keep the edge of your groundsheet just inside the awning. You can even turn the edge up so it rests agains the inside of the awning if you want to be really certain, but make sure it stays that way and doesn’t drop down and protrude.
This also applies to a footprint used with a tent, I had to turn the edges in of a groundsheet that was supposed to fit but funneled water straight between the footprint and the tent groundsheet.
Thanks for your comment Alan. We filmed this video and took the photos for this blog post in very muddy conditions, and this is why we pegged into the groundsheet to try to keep the awning as clean as possible. Ordinarily, we would agree with your comments and that when setting up in normal conditions, we would have the groundsheet turned under and inside the awning. Also, Isabella offers a range of carpets called ground cover (which we didn’t have on the day) that can be pegged through and have on the floor to keep the awning cleaner during these conditions.
I have to agree with Colin regarding the pegs in close proximity to the caravan, not easy especially on a hard standing pitch. I am always learning something or being reminded of something I need to get right in these articles, always a good read. I think the best method though is being as methodical as can be and make sure you have read your particular instructions and have them with you at all times. YouTube articles are a good watch also.
very informative
Excellent really well and simply explained
Very useful. Even though I have been caravan g for some years. There is some good tips in the video.
I have always found it a real problem with the first pegs to be put in either side of the awning ,underneath the caravan, or direct in line with awning. they never seem to sit well, difficult to peg in because of the close proximity to the van and are constantly being readjusted
Well thought out and process of erecting the awning with checks of its construction.
Good advice