
There are a number of benefits of having a level motorhome.
Firstly, equipment such as absorption fridges tend not to work as well on uneven ground. Sleeping in a sloping motorhome can also be quite uncomfortable, and you don’t want hot pans slipping off the hob when cooking! Finally, the sinks and shower will need a level base to drain completely after use.
A level motorhome can be achieved very quickly and is the first task that should be completed once you’ve manoeuvred onto your pitch. If possible, select a pitch that’s already fairly level and reverse onto the pitch as per the campsite’s instructions.
Equipment needed to level a motorhome
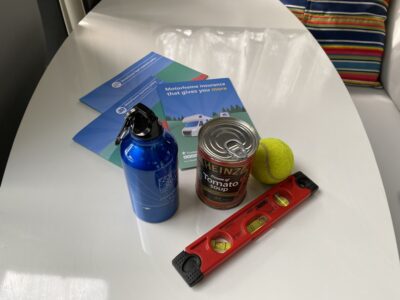
- A spirit level or form of levelling device. Some mobile phones have a spirit level and there are motorhome levelling apps
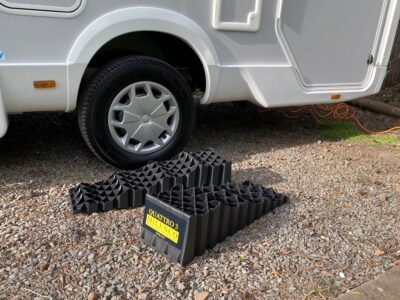
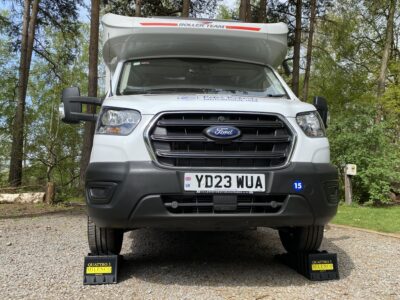
- At least two levelling ramps that are specifically designed for motorhomes.
- Someone to give you a helping hand!
In this video, we show you how to level a motorhome.
How to level a motorhome from left to right
Using the spirit level will help you to understand which way the motorhome needs to be level, as will a tin of soup or a tennis ball placed on the floor. Some motorhomes will lean to the front, but in our video we start by measuring left to right.
Place your spirit level (or whatever device/equipment you’re using) on a surface that you know will be level when the motorhome is level, such as the floor or a worktop. Ideally, the bubble should be in the centre. If it’s not, you will need to raise one side of the motorhome.
Next, turn the spirit level 90 degrees and measure from front to back. If it’s level, you’ll just need to raise the side that is not level, which in this case is the right hand side.

Place a motorhome levelling ramp in front of the front driver’s side wheel, and one in front of the right hand side rear wheel.
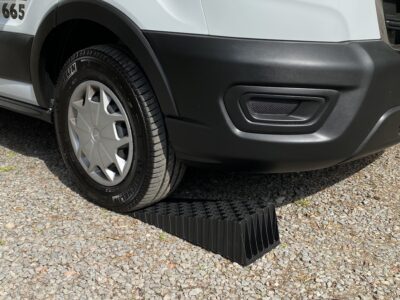
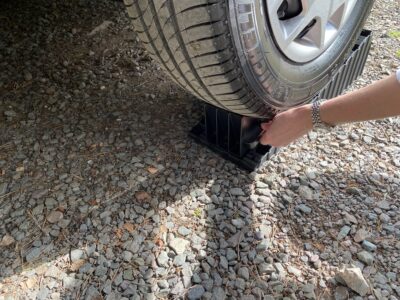
Kick one of the motorhome levelling ramps, so it tucks slightly under the tyre. The process here is to drive the motorhome to the very top of the ramp, then using the foot brake to control the descent, roll back until the motorhome is level.
Before driving up the ramps, make sure no one is close to the motorhome and well away from the levelling ramps. Using gentle throttle and clutch control drive the motorhome forward until it’s at the top of the ramp. It’s useful to have someone to help you spot your position and give signals or call out you’re at the top of the ramps.
Once at the top of the ramp roll back gently until the motorhome is level.
You might need to stop and look at the spirit level to check how far off you are from being level. Some motorhome levelling apps have audible alerts to help you if you’re on your own.

Once level, apply the handbrake, switch the engine off and leave the motorhome in gear.
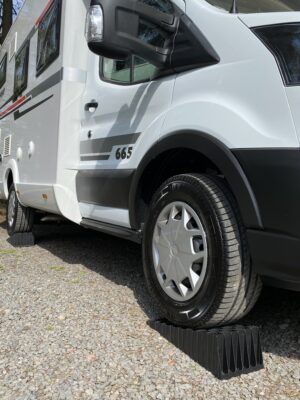
If you have levelling ramps with chocks, then place one behind each tyre.
How to level a motorhome from front to back
This can be achieved by simply chocking the two front wheels of the motorhome with the ramps and repeating the steps above.
You can make sure your motorhome is level by pouring a glass of water, (or something a bit stronger!), and pop it on a table or worktop. A tennis ball or that tin of soup on its side mentioned earlier are also great indicators of how level you are as they should stay still.

If your motorhome is already level it’s still a good idea to chock your front or rear tyres at the back.
Automatically levelling a motorhome
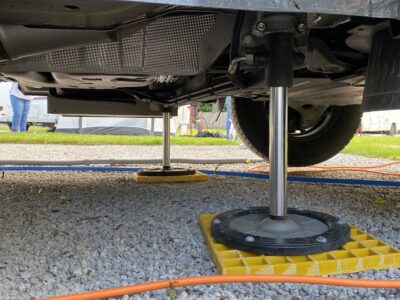
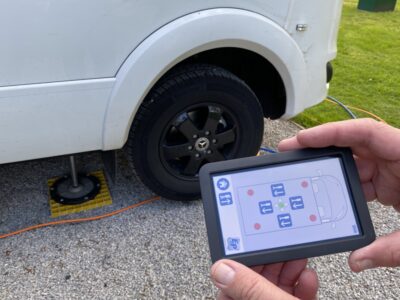
If you’re lucky enough to have an automatic or a self-levelling system, you’ll simply need to activate this once you’ve parked up your motorhome on your pitch and use the controls/controller provided.
Don’t forget the ramps when you leave
It’s important, not to forget that your motorhome is on the levelling ramps when leaving your pitch! Reverse slowly down them and pack them away before heading off.
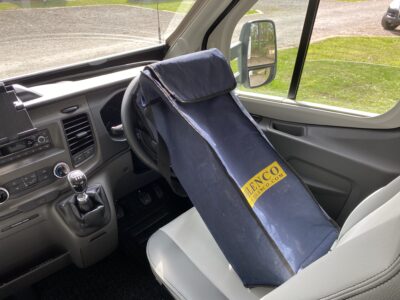
We find that leaving the bag for the levelling ramps on the driver’s seat, on the dashboard or in the footwell is a good reminder that you need to back down the levelling ramps rather than simply driving away!
Do you have any other tips for levelling a motorhome? Feel free to share them in the comments box below.
Also, see our guide to motorhome levelling ramps.
We have levelling ramps which we keep in the m/h. We rarely use them as as long as the bubble is somewhere in one of the circles it isn’t a problem as long as we can cook safely, sleep in comfort, the water drains & the fridge works. If we do use then we have to leave the handbrake on which hampers the swivel seat. It has been suggested that you shouldn’t leave the vehicle in gear….. I would dispute this, it is good practice to leave a vehicle (any vehicle) in gear particularly if the vehicle is on a slope, in case the handbrake fails. Also I was taught to leave the handbrake OFF when leaving the vehicle for any length of time as it could stick, providing the vehicle is not on too much of a slope.
What do you suggest if you need to level from side to side and also from front to back as this is something I often find necessary?
Hi Graham,
If you find that the motorhome is not level from front to back and also left to right, there are a couple of suggestions:
You should be able to complete this with just 2 ramps, and placement of these ramps is the key to getting a level motorhome. Firstly, When you not level front to back and left to right, work out which of your four corners is the lowest. In this example, lets assume the motorhome is nose down and dipping to the right. That would mean the front right corner is the lowest point. Try to use just 1 ramp under that tyre.
If however, you find you are now level front to back but still dipping to the right, then follow this trick:
Start to level with that same single ramp under the front tyre. Stop halfway up the ramp and apply a 2nd ramp under the rear right, to bring the right hand side of the motorhome up. This may take some practice and some shuffling, but the combination of 2 ramps, and having each wheel at a slightly different position may be enough to get the motorhome level.
Hope this helps?
Liz
Thank you for this article, which is very good for inexperienced campervanners and largely common sense. My problem is not in levelling, but how to remove the chocks when wanting to move off, especially if you are on your own. I found that the wheels dropped down onto them making them so tight that I had to reverse back up the ramps, judging it so as not to go over the top, then put the brakes on and hope the van does not move while you are removing the chocks. Does anyone have any suggestions?
I’d give article 4 out of 5, would have given it 5 out of 5 if the following notes of caution had been added:
If using ramp chocks separate from the ramps they can stick to the tyre resulting when rolling or driving off, the chock being taken up into wheel arch jamming against the body, damaging bodywork and inner wheel arch cover and in the worst case jamming the wheel solid against the bodywork. It happened to me so don’t let it happen to you.
Also, for those with a hydraulic levelling system, make sure the hydraulic rams are fully retracted before driving off. I’ve come across a number of owners who’ve told me of bent rams resulting in embarrassment and travel delays whilst the damaged hydraulic cylinder is mechanically put into a safe position or removed
Thanks for those extra words of caution Barry
Really good article people sometimes forget about the level of a motorhome especially how critical it can be for the fridge to work properly and water draining from sink units
Thanks for the great feedback Tony
Handy for me as first-time.
Very useful. Need on on getting the TV tuned in properly
One of the sit es I go to is on slight incline meaning nearside of van when parked dips to nearside. What I do is place wheel chock offside score line on gravel. Then move chock say 4 inches forward of line. I then place nearside chock tight under nearside wheel so when I drive up I can see the distance. Check chock nearside and you should be at top level N/S and O/S I then have rear jacks that I can adjust to make front and rear level O ther sites only require front chocks as ground is level. Little harder but worth doing nothing worse than un-level van.
Helpful – Thanks
Great tips on how to, but it also reminded me that I need to get some ramps first.
Particularly on a longitudinal slope, put the ramp/s on the down hill side of the wheels then use gravity to help get onto the ramp/s. This has two advantages, 1, it gives the clutch an easier time and 2, should the handbrake fail or perhaps be accidentally released, the van will only roll to the end of the ramp.
Leaving the van in gear I would be against, I have seen too many vans started in gear.